Did you know that 2/3 of Facebook users visit the Facebook page of a local business at least once per week? Using Facebook as part of your business’s social media marketing strategy can drive significant returns in the long run.
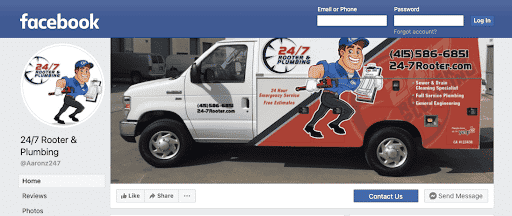
Your Facebook business page acts as a source of information for many of your potential customers. Facebook business pages make it easy for prospective customers to connect with you by providing important information about your business and its offerings.
This can include its working hours, contact number, physical address, special promotions, updates, and more. (You can also show off positive Facebook recommendations and reviews to attract a greater audience!)
If you’re opening a new location or branch, adding this location to your Facebook page can help you draw in more customers for that location. Facebook also allows you to make the best of your location structure by posting location-specific content and hosting Facebook ads that are fine-tuned for your audience in that region.
Are you running a business with multiple locations and need to learn how to manage them on your Facebook business page? Keep reading to find out how!
WANT MORE FACEBOOK REVIEWS?
Download our free guide to discover the best ways to get more reviews for your Facebook profile, fast!
Adding Multiple Locations to Your Facebook Business Page
The way to manage these locations depends on the size and type of your business. If you don’t actually have an individual store or physical storefront, you can still add a general location, such as a city or a state, to your business page.
However, if you’re a multi-location business (meaning that you manage more than one store location), creating an individual location page for each is a must and can help boost your visibility on the popular social media platform.
The Facebook Locations feature allows you to add multiple business locations to your main Facebook page (AKA the “parent page”). From this main brand page, you can create “child pages” dedicated to every location you want to showcase on Facebook. Potential customers can then view your multiple branches through the Locations tab on the parent page.
To start adding multiple locations to your Facebook business page, follow these general steps below:
Request Access to “Facebook Locations” from Facebook
To get the ball rolling:
- Log in to your Facebook business page.
- Head over to the Facebook Business Location Manager.
- Ensure that you have editor or admin access to your Facebook page. (You can do this by checking Settings > Page roles.)
Now, if you aren’t already using Facebook Locations, you will need to request access to the tool.

Once you have access, you can quickly create new store pages in addition to your existing page, provide detailed store information for each location, and manage everything from a unified dashboard.
Add Your Business’s Locations One at a Time
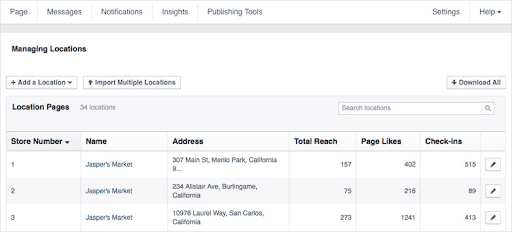 Source: Facebook
Next, it’s time to add your locations.
- Choose “Settings” at the top right-hand corner of your Facebook Business page.
- From the drop-down menu that comes up, choose “Locations”.
- From here, you can add new locations one at a time by clicking “+ Add a Location”. (You can create brand new pages for your locations or simply add existing pages.)
Note: If this is your first time using the tool and adding multiple Facebook location pages, you will be asked to remove any existing address from your main/parent page. Facebook does this to ensure that the main page simply remains the “parent” page for each business, and each “child” page will be associated with a different address.
Adding Locations if Your Business Uses “Facebook Business Manager”
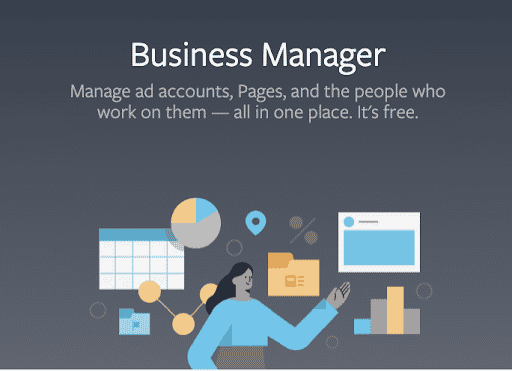
Alternatively, if your business uses Facebook Business Manager, also known as Facebook Business Suite, you can directly add new locations through this platform.
Adding multiple locations to your business page is easy with Facebook’s new Business Manager. Not only can your business manage all of its ads, but you can also now track all of your locations in one place, giving you one convenient dashboard.
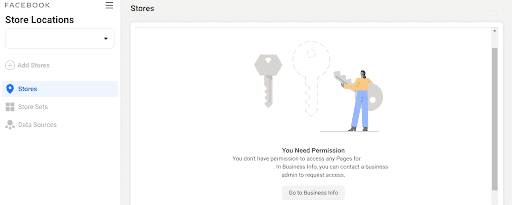
As with the Facebook business page, you have to make sure you have editor or admin access. If you don’t change your page role to admin or editor, you will see this block come up later:
Once you’ve ensured you have admin or editor access, it’s time to start managing your locations.
- From your Facebook Business Manager’s drop-down menu, go to Assets > Business Locations.
- From here, you can start adding the multiple store locations you want to highlight on the tool.
There are three ways you can go about this.
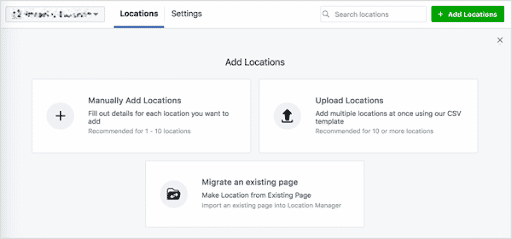
- You can add each location manually, which is the recommended approach if you have ten or fewer locations.
- You can also upload locations using the platform’s CSV template, which is the best method to use if you have more than ten locations.
- If you have existing pages for each Facebook location, you can also migrate them over to one unified page.
Select the best choice based on the number of locations you have. Once you’re done, you also have the option to click “Download Locations” and download a spreadsheet of the locations you’ve displayed for your own reference.
You’re all set!
Where do you go from there? Time to get your business promoted on Facebook and build your positive brand reputation!
Meet Your Business Goals with Signpost
Whether you’re looking to connect with customers live, automate your marketing campaigns, or boost your online reviews, Signpost has you covered.
Thousands of home service businesses use Signpost to make the best of their online reputation. Whether you’re an electrician, plumber, general contractor, or HVAC contractor, we’re here to support your business.
Signpost can help you:
- Monitor your business page for negative reviews and address customer feedback
- Generate and respond to positive reviews on a timely basis
- Simplify and automate your marketing efforts
- Make the best of your social media presence
- So much more!
Sounds exciting?
Get started with a demo today!

You've added multiple locations to your business page. Now what?
Discover the best ways to get more reviews for your Facebook profile, fast!

